High-Protein Apricot Thyme Tart
beauty breakfast series

It took me 3 rounds to get this grain-free gluten-free dairy-free AND sugar-free tart crust to work! It holds beautifully and has a gentle, simple savory taste. I leveled up the filling each time and for the final result, landed on a dairy-free, sugar-free almond custard! It feels like a whisper of the many French patisserie treats I got to enjoy while at chef school. The filling is rich and creamy and is in many ways a healthier and more nourishing version of almond frangipane! It is not extraordinarily sweet, so if you like a really decadent breakfast, I recommend drizzling it with maple syrup right before its final bake.
Full of protein, this tart will start your day off strong! Enjoy!


Chef Tips: when pressing out the dough to make your final crust, keep a glass handy with an ice cube in it and rub it over your pressing hand to keep your palm chilled so as not to melt the fat in your dough! It’s okay if a little bit of water moisture interacts with the dough as a result. Also, I’m a big fan of using Celtic sea salt, not kosher salt as it has far more flavor! Lastly, bake your tart on the bottom rack of your oven, because almond flour can brown or burn very quickly. This will also make sure your bottom is solid, not just your sides.


RECIPE
MACROS
12g protein ~ 20g fat ~ 5g carbs
per slice
gluten-free, grain-free, sugar-free, dairy-free
makes 8 slices
Ingredients
2 cups Super-Fine Almond Flour (not meal)
2 tbsp Arrowroot Flour
½ (or more if you like a salty crust) tsp Celtic Sea Salt
1 Egg + 1 Egg Yolk, pasture-raised
3 tbsp Extra Virgin Olive Oil
½ tsp Vanilla
1 tbsp real Maple Syrup
~
1 tbsp Thyme
10-12 ripe Apricots, organic
½ cup raw Almond Butter
2 Eggs, pasture-raised
4 tbsp Marine Collagen
¼ tsp Vanilla
2 tbsp real Maple Syrup
Pinch Celtic Sea Salt
Pinch Cinnamon
~
Extra Virgin Olive Oil
Instructions
Preheat oven to 350 degrees.
Mix all dry ingredients together, and then the wet in a separate bowl. Make a small well in the dry and slowly add the wet to it. Use a fork to gently incorporate the dry into the wet until it’s all combined thoroughly.
On parchment paper, roll out the dough into a disc shape about ½ inch thick, seal up any cracks in the dough as you do this, then wrap it well in parchment to prevent air from entering and place in a ziplock bag or wrap in beeswax or plastic wrap. Place in fridge to chill for an hour or overnight.
Combine all the ingredients in your second list for the custard filling.
Pull the dough out and, while it’s still chilled, press it out into a wider circle. Thin it starting from the center moving outward with your palm, then start to build your edge. Finish by using your thumb to sweep around the crust edge base to formalize the barrier. If you desire, you can gently poke the tart base with a fork, just know it may make your dough inflate while baking so you’ll need to press it back down when you pull it out to cool.
Pop into the oven for 10 min to par-bake. Then let it fully cool. You can place it back into the fridge if needed.
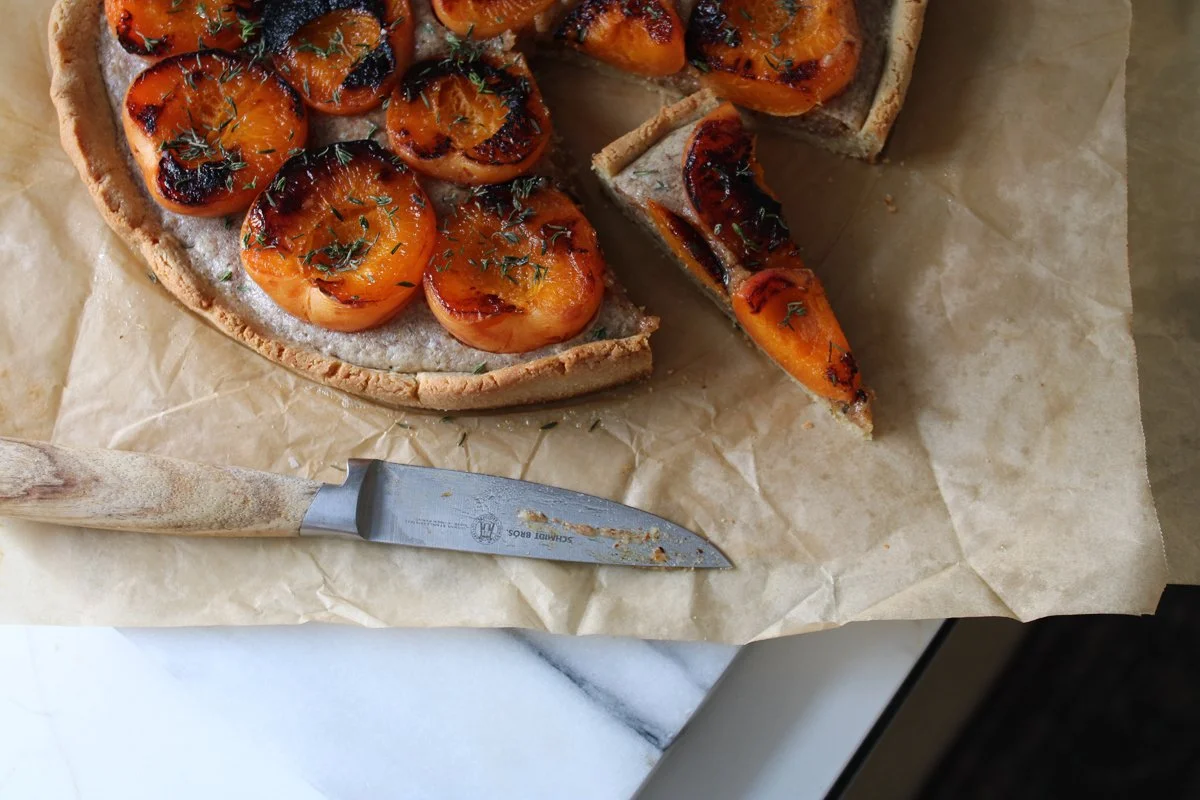
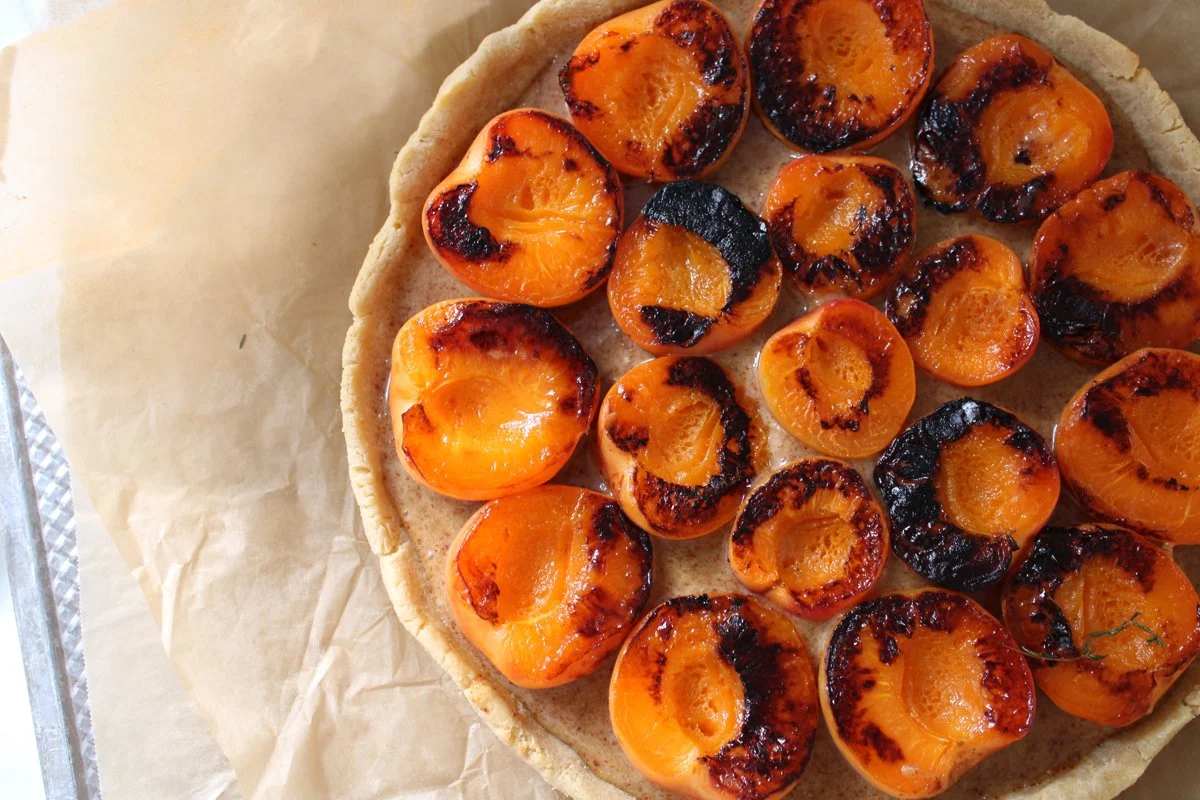
Cut open your Apricots, following the natural indent, and remove the pits. Heat a heavy-bottomed pan and then add Olive Oil to cover the surface. Lightly salt the face of your apricots, then place them face down to sear. Don’t move them. To check, simply lift an edge. Let them get very dark - you’ll love it.
Add custard filling and place Apricots around the edge and then in the center. Decorate with your Thyme and more Sea Salt or a drizzle of Maple Syrup if you desire a more decadent breakfast.
Bake for 20-25 min, until the crust is golden and the Apricots starting to melt.
Let it rest and then serve! You can store it in the fridge for up to 10 days.